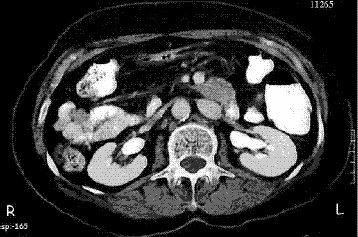
Figure 2.
Control abdominal computed tomography shows complete recovery.