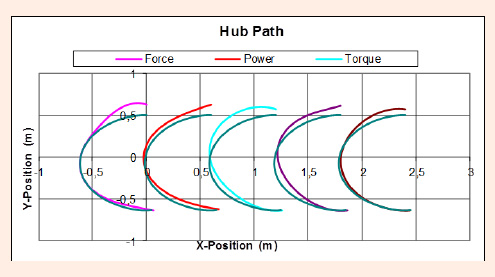
Figure 8.
Comparison of kinetic optimized hub path to actual hub paths for subject 1.