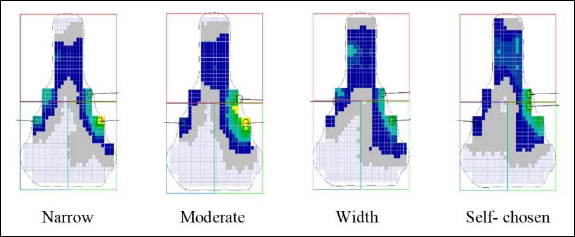
Figure 3.
Pressure map of cycling with different saddle widths.