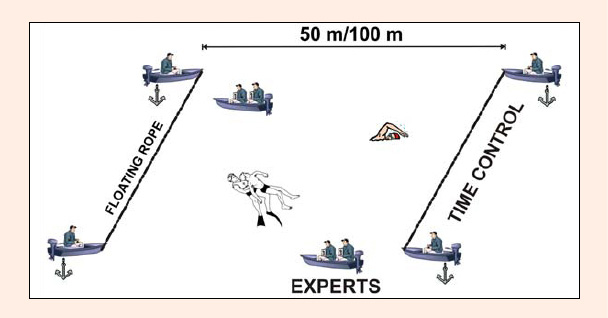
Figure 1.
Explanation of the experimental setup.