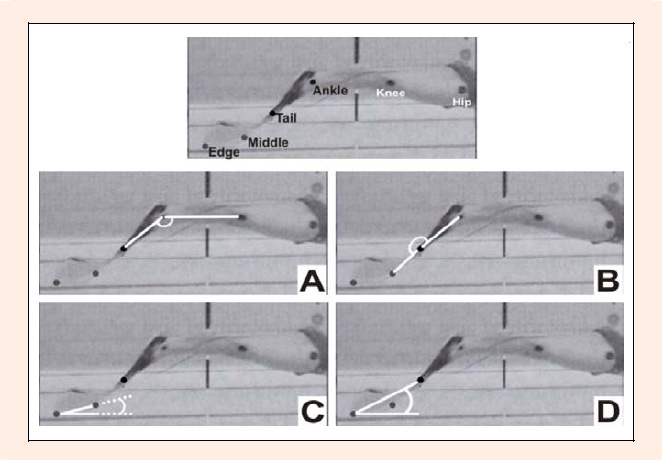
Figure 2.
An explanation of monofin marking.