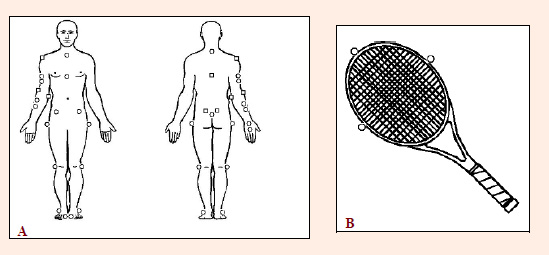
Figure 2.
Representation of body (A) and racket (B) marker (circle) and additional anatomical points (square) placement.