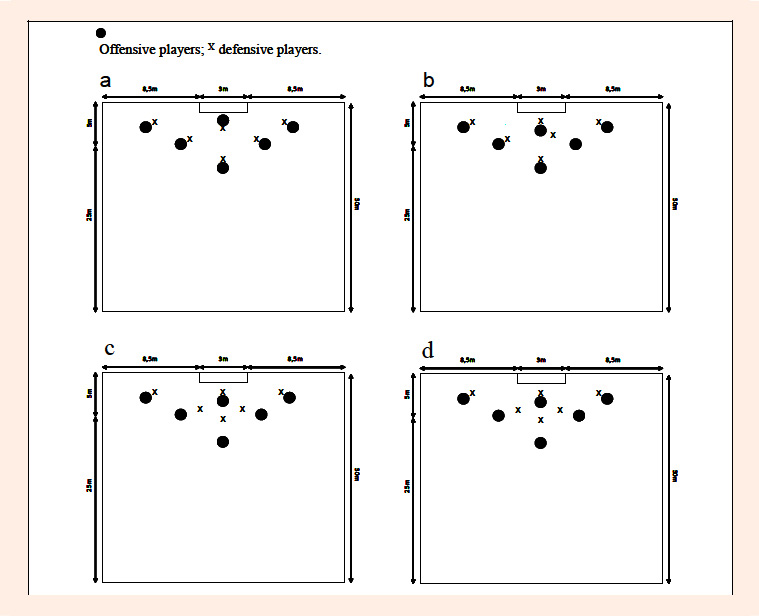
Figure 3. Schemas of the even defensive arrangements: a) “pressing” (i.e., each defensive player is exclusively positioned at facing of a single offensive player); b) “zone 1-2” (i.e., one of the defensive players positioned in correspondence of the right side offensive arrangement systematically occupying the opponent centre forward playing zone, in order to doubly mark the latter offensive player); c) “zone M” (i.e., one of the defensive players occupying the opponent centre forward playing zone, in order to doubly mark the latter offensive player, and one or two defensive players positioned in line or forward with respect to direct opponent player), and d) “zone 2-3-4” (i.e., the defensive players positioned in correspondence of the left, central, and right side of the perimeter offensive players systematically occupying the opponent centre forward playing zone, in order to doubly mark the latter offensive player).