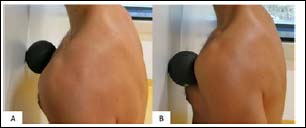
Figure 3. Schematic representation of the two turn positions during the rolling intervention. A = most medial position at the upper end of the sternum (distal of the sternoclavicular joint). B = most lateral position at the beginning of the axillary fold.