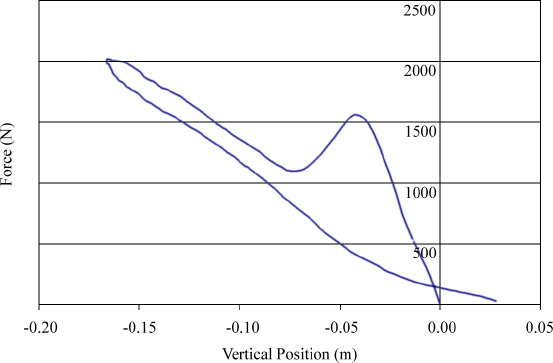
Figure 4.
Force versus displacement curve showing hysteresis and heel strike.