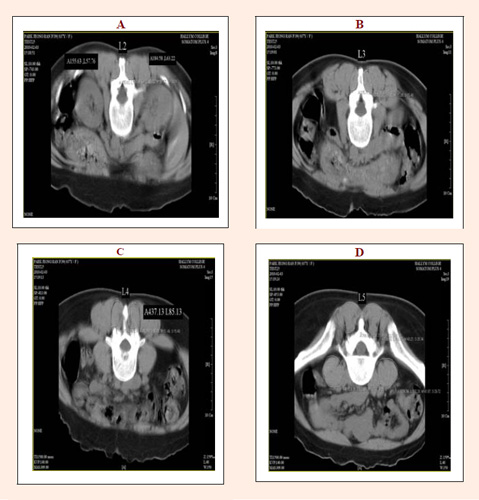
Figure 4.
Cross-sectional images of the multifidus muscle. (A) L2 region. (B) L3 region. (C) L4 region. (D) L5 region